Using Images
This page shows how to get images to appear the way you want on your pages. It also demonstrates a few other image components you can easily copy and paste onto your pages, like an image carousel and a before/after slider for comparing two images.
If you want a header image on the top of your page, please visit the image headers page.
Inline images
We use a small include file called figure.html to help format our images consistently across different pages. You can copy and paste this code and put it anywhere you want an image.
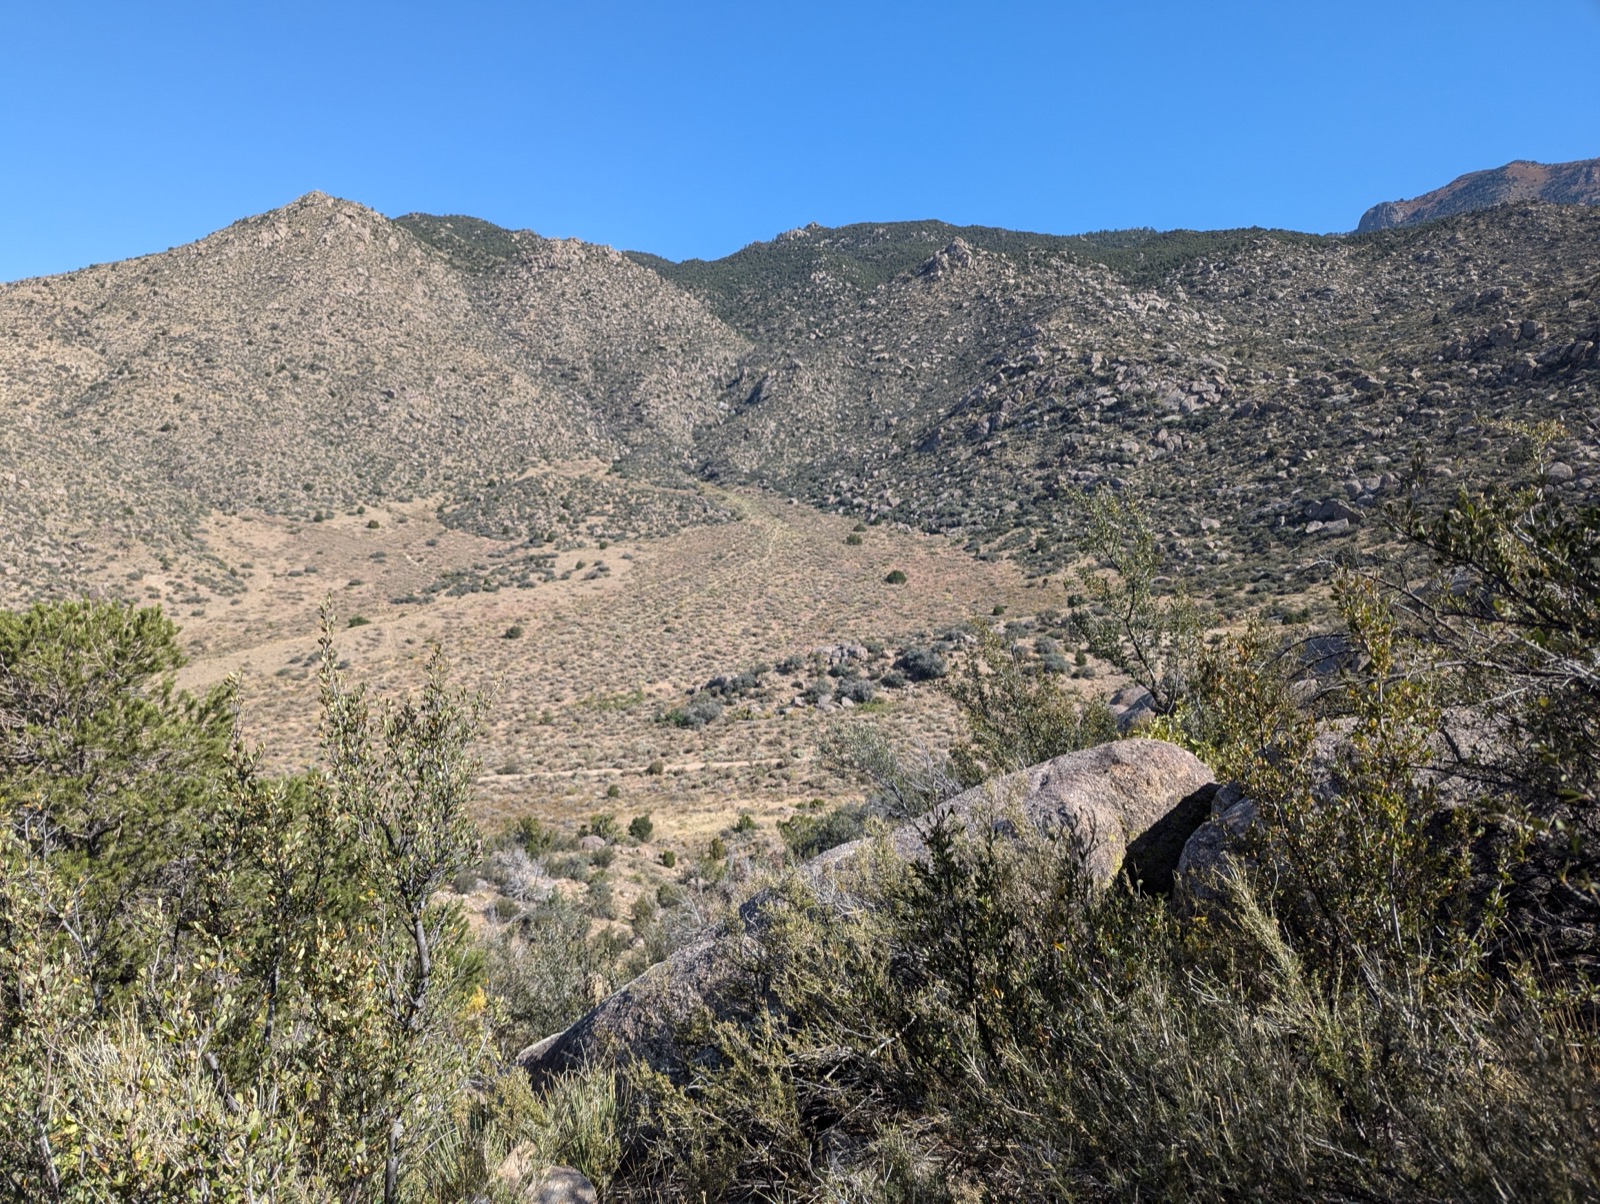
What a nice view
OK, here we have a basic image off to the right. The basic code snippet to display the image is shown just below.
{% include images/figure.html
  class="right"
  width="40%"
  caption="What a nice view"
  alt-text="Color photograph showing some hiking trails in a canyon of the Sandia foothills."
  image-path="/assets/images/backgrounds/hike-1.jpg"
%}
Formatting options for basic images
- class:
left,center,right - width: specify a value for the width, usually as a percent of the page width (like 50%)
- caption: use captions to add context to your image or describe what it’s meant to illustrate.
- image-path: a path to your image
- Your path will often look like
images/filename.jpg. This is a “relative” path because the image location is RELATIVE to the page on which you’re trying to load the image. - You can also use an ABSOLUTE path to your image, which means the path starts with a
/and begins from the root folder of your website.
- Your path will often look like
- alt-text: descriptive text for accessibility
Why Alt-Text Matters
Alt-text (alternative text) is a written description of an image that can be read aloud by screen readers for visually impaired users. Including alt-text is essential for making your site accessible to everyone.
- Describes the image content and context, not just what you see
- Focuses on what’s relevant to your narrative or argument
- Keep it concise but descriptive (typically 1-2 sentences)
- Avoids redundant phrases like ‘image of’ or ‘picture of’
If you don’t include an alt-text parameter, the caption will be used as the alt-text, which is better than nothing but not always ideal.
Pro tip: Alt-text and captions serve different purposes. Captions can be more interpretive or contextual because it deliberately complements the image or alt-text (like ‘This transformation took only six months’), while alt-text should be more descriptive (like ‘Two photos side by side showing a vacant lot and then a completed brick building’).
Some examples
It’s easy to place images in your story, ones are “fixed” to the page and move along with the text. Usually you’ll have them off to the left or right and have the text flow around them.
We’ll use the below code to put a nice image off to the right.
{% include images/figure.html
  class="right"
  width="60%"
  caption="What a nice view"
  image-path="/assets/images/backgrounds/hike-1.jpg"
%}
What a nice view
You can have them off to the right
Etiam finibus risus et sagittis suscipit. Praesent id nisi metus. Vivamus odio ligula, iaculis vestibulum convallis id, vehicula at justo. Sed vestibulum elit at ante pellentesque pretium. Vestibulum euismod tempus sem sit amet scelerisque. Curabitur hendrerit fermentum rutrum. Nam suscipit dictum purus, non rhoncus dui sodales nec. Etiam convallis arcu metus, ut cursus risus porttitor sit amet. Duis ut sapien varius libero efficitur vehicula. Sed id massa id elit ullamcorper feugiat. In hac habitasse platea dictumst.
In hac habitasse platea dictumst. Sed ultrices venenatis nunc et eleifend. Praesent sapien enim, porta egestas tortor vitae, imperdiet mollis velit. Cras quis quam lacus. Cras ac felis sed nunc bibendum rutrum vitae at massa. Mauris id vestibulum dolor. Vivamus iaculis sollicitudin purus sit amet gravida. Aliquam erat diam, pretium eget urna at, pretium bibendum nunc. Nullam finibus aliquet diam, in ullamcorper odio vulputate tincidunt.
What a nice view, again
You can have them off to the left
This one’s a bit smaller, so you can see that having an image just 25% of the page width is pretty small.
Vestibulum euismod tempus sem sit amet scelerisque. Curabitur hendrerit fermentum rutrum. Nam suscipit dictum purus, non rhoncus dui sodales nec. Etiam convallis arcu metus, ut cursus risus porttitor sit amet. Duis ut sapien varius libero efficitur vehicula. Sed id massa id elit ullamcorper feugiat. In hac habitasse platea dictumst.
In hac habitasse platea dictumst. Sed ultrices venenatis nunc et eleifend. Praesent sapien enim, porta egestas tortor vitae, imperdiet mollis velit. Cras quis quam lacus. Cras ac felis sed nunc bibendum rutrum vitae at massa. Mauris id vestibulum dolor. Vivamus iaculis sollicitudin purus sit amet gravida. Aliquam erat diam, pretium eget urna at, pretium bibendum nunc. Nullam finibus aliquet diam, in ullamcorper odio vulputate tincidunt.
You can have them centered
So you can see that having an image at 50% of the page width creates a lot of space that would be awkward to cram text into. But sometimes it’s useful to set an image apart from the text to highlight it.
What a nice view, again
Vestibulum euismod tempus sem sit amet scelerisque. Curabitur hendrerit fermentum rutrum. Nam suscipit dictum purus, non rhoncus dui sodales nec. Etiam convallis arcu metus, ut cursus risus porttitor sit amet. Duis ut sapien varius libero efficitur vehicula. Sed id massa id elit ullamcorper feugiat. In hac habitasse platea dictumst.
In hac habitasse platea dictumst. Sed ultrices venenatis nunc et eleifend. Praesent sapien enim, porta egestas tortor vitae, imperdiet mollis velit. Cras quis quam lacus. Cras ac felis sed nunc bibendum rutrum vitae at massa. Mauris id vestibulum dolor. Vivamus iaculis sollicitudin purus sit amet gravida. Aliquam erat diam, pretium eget urna at, pretium bibendum nunc. Nullam finibus aliquet diam, in ullamcorper odio vulputate tincidunt.
Side by side
To achieve two images side by side use, make sure the width for each is 48%. (It’s less than 50% to make room for margins.) Note that you use class="left" for both images so they simply stack horizontally left to right.
Here’s an image on the left.
Here’s an image on the right.
{% include images/figure.html
class="left"
width="48%"
caption="Here's an image on the left."
image-path="/assets/images/default.jpg"
%}

{% include images/figure.html
class="left"
width="48%"
caption="Here's an image on the right."
image-path="/assets/images/default.jpg"
%}

<p style="clear:both"></p>
Note there is a little bit of code <p style="clear:both"></p> that makes sure you don’t get a little text showing up just to the right of the images, and that text always starts below both images.
Full-width
Of course you can have the image take 100% of the page container, but make sure you’re image is large enough so that it doesn’t look grainy.
{% include images/figure.html
  class="center"
  width="100%"
  caption="Make sure your image is large enough to be 100% width or it will look grainy."
  image-path="/assets/images/default.jpg" %}
Make sure your image is large enough to be 100% width or it will look grainy. See above.
Jumbotron Images
You’ll notice that even a “full-width” image is still bound by our page margins. But sometimes you just need to turn things up to 11.
In that case, go jumbo! You can make an image be the whole width of the browser window, and control the height of the image for whatever effect you need. Set the height parameter to be the % of the browser height. (So, 100 will take up the browser winder, however big or small that is.)
{% include images/jumbotron.html
  height="50vh"
  image-path="/assets/images/default.jpg"
  title=""
%}
Juxtapose
It’s easy to set up a slider to compare historic and contemporary photos. If you find a historic image from a vantage point that you can replicate, please take a modern photo so we can better illustrate the changes in the surrounding space. Obviously the effect is more striking the closer the images line up.
The following code supplies a simple image1, image2, and optional caption.
{% include images/juxtapose.html
image1="/scrollstories/forest/images/mvh-tv-room.jpg"
image2="/scrollstories/forest/images/mvh-hist-common-room.jpg"
caption="These sliders are way more effective the more closely you line up the before and after images."
%}
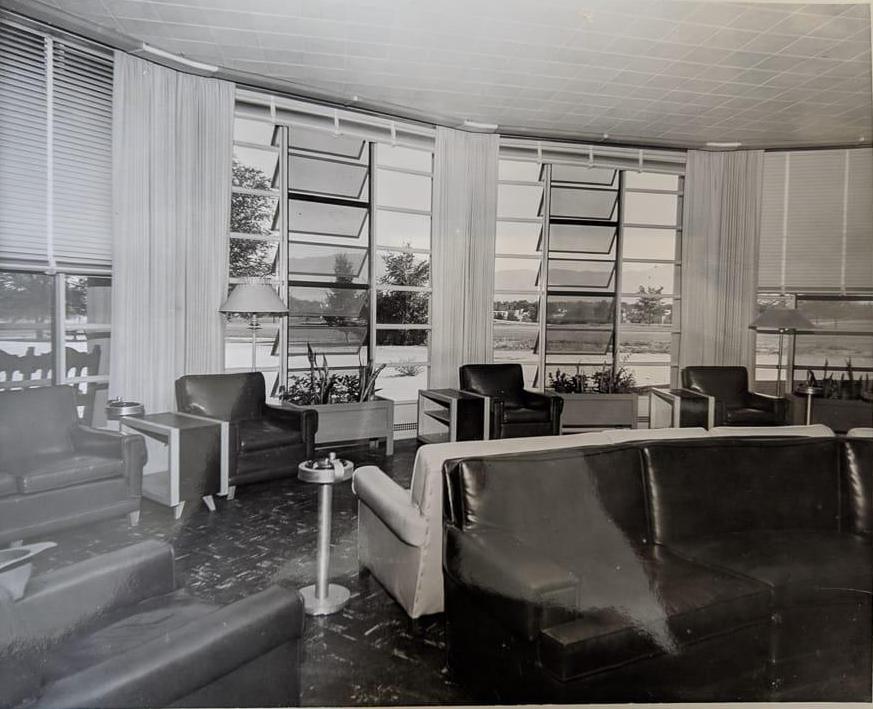
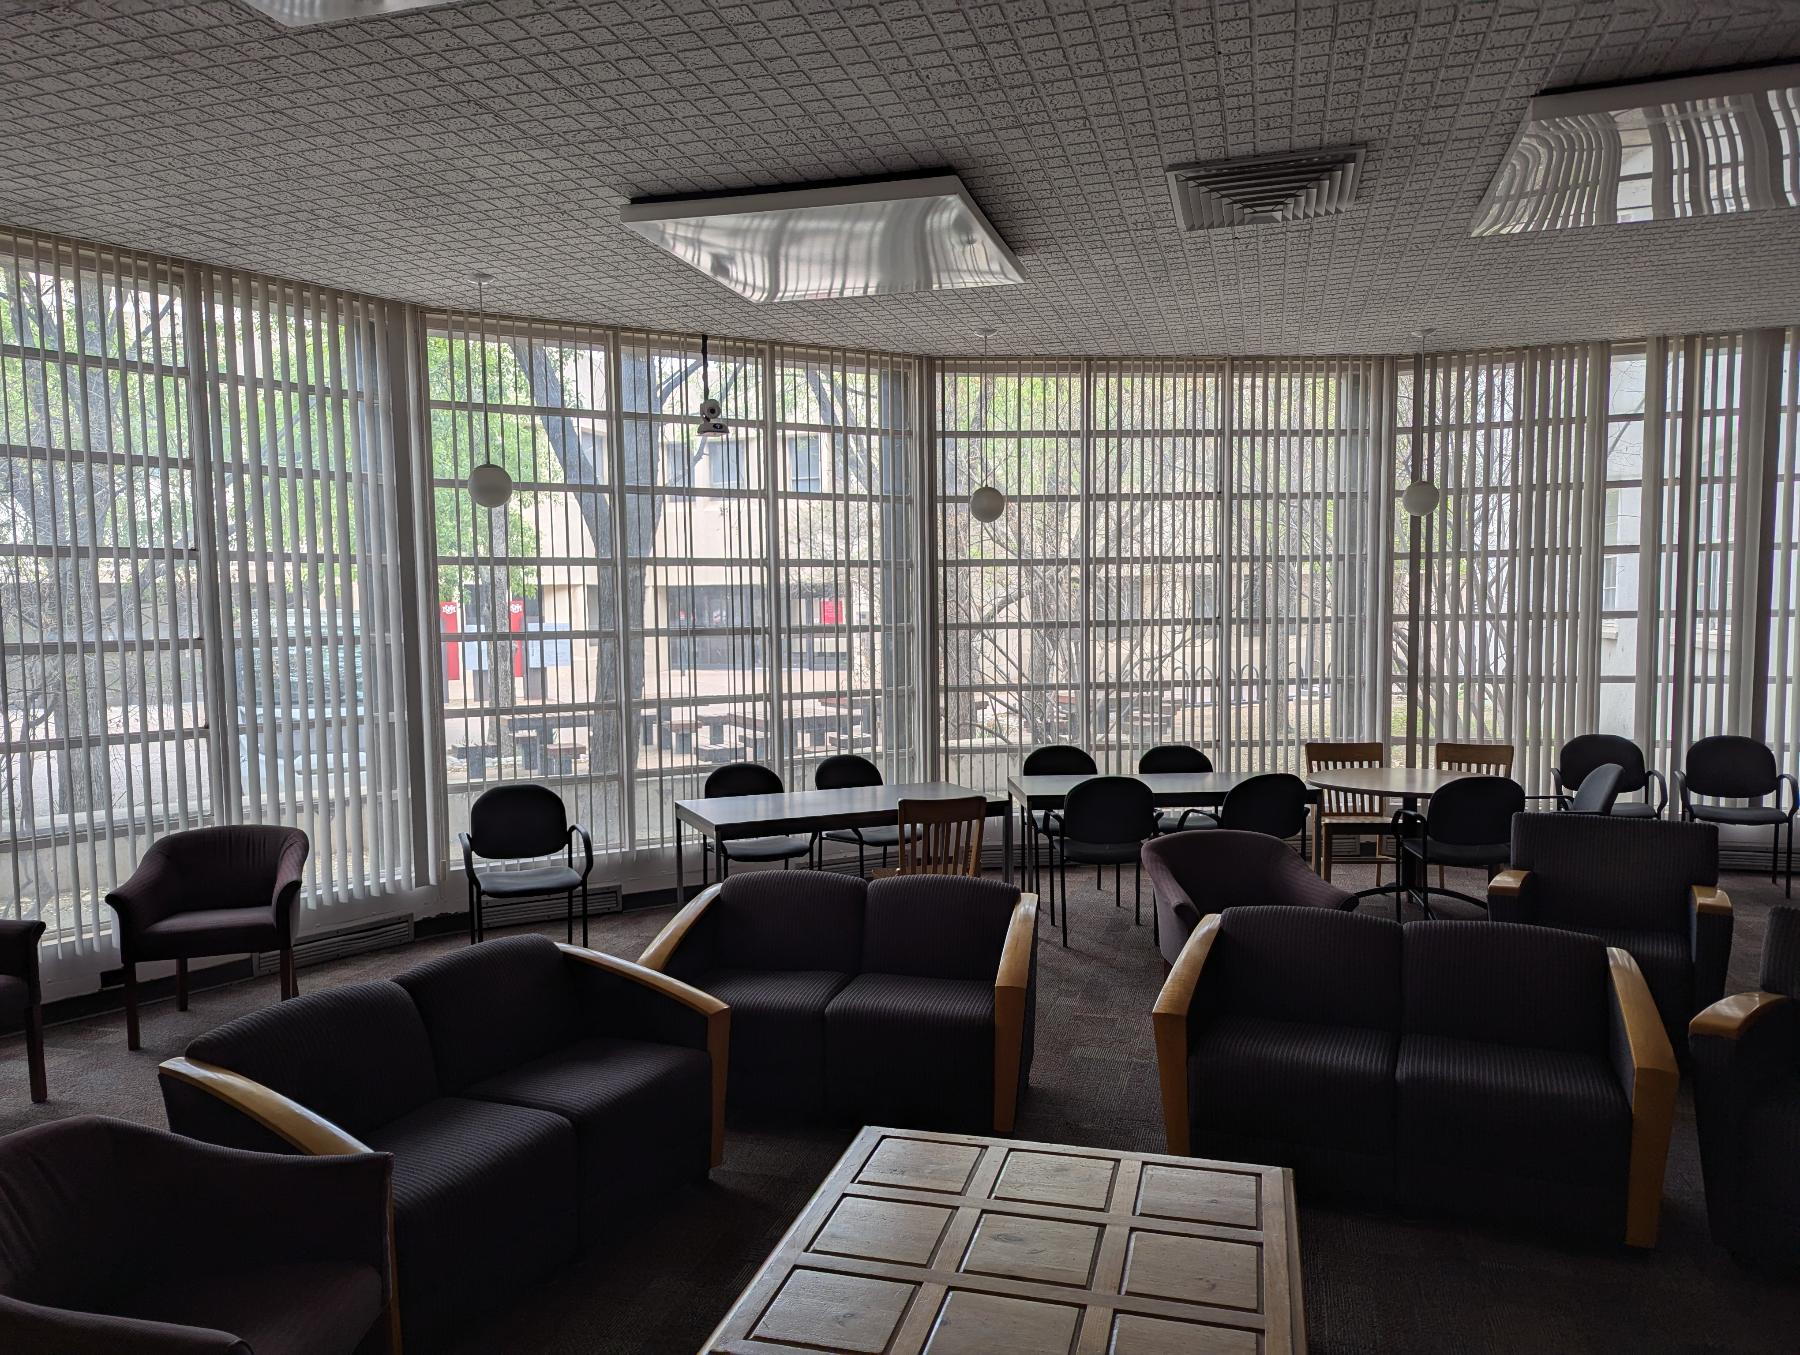
From the TV room to the Chair room (actually, the History Department Common Room). With a less good view of the mountains.
Carousel
Do you have some cool images unsure how to integrate in your essay? Use a slide carousel! There are several little bits of code to include, which provide lists for:
- image filenames
- image titles (optional)
- image captions (optional)
And there is one little bit of code to include to actually display the carousel. If you don’t want headers or captions (you can have one and not the other), just omit them from the list.
You can use width and class parameters (like when including images) to size and position your carousel.
The following code generates the slide deck just below. Be sure to just copy and paste and edit carefully!
{%
assign images =
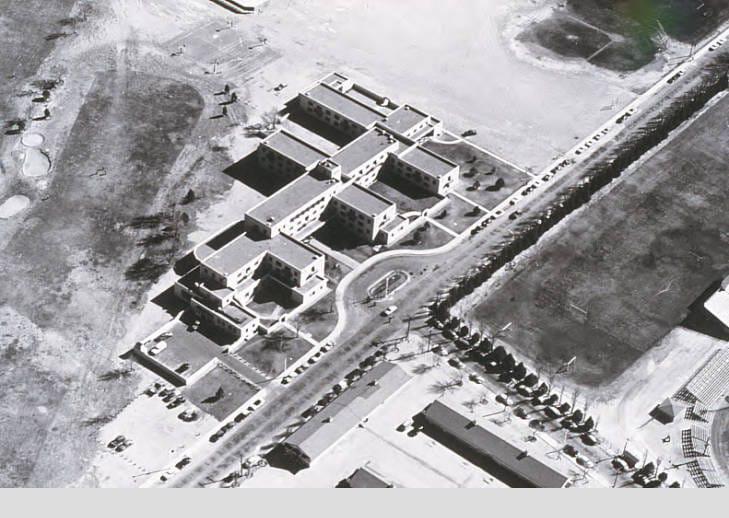
"/scrollstories/examples/forest/images/mvh-construction.jpg,
/scrollstories/examples/forest/images/mvh-room-cost.jpg,
/scrollstories/examples/forest/images/mvh-tv-room.jpg" | split: ','
%}
{%
assign headers =
"A Photo Title,,
No caption here" | split: ','
%}
{%
assign captions =
"It's useful to have informative captions|
This image has a caption, but no title|
" | split: '|'
%}
{% include images/carousel.html
width = "60%"
class = "right"
images = images
headers = headers
captions = captions
%}

A Photo Title
It's useful to have informative captions

This image has a caption, but no title

No caption here
That’s a wrap
That’s all for basic images!
We can also do background scrollboxes, background switching, and side scrolling.
If you are having trouble getting your image to appear, you’re not the first one to have this problem! It’s a common issue for folks dipping their toes into coding. Hop over to our troubleshooting page. Probably, the image PATH and/or FILENAME does not match exactly where your image is located or the name of the file.